How to Upload File Using JMeter Example: JMeter is one of the most used open-source performance testing tools. we can use it for different types of load tests like Smoke, Load, Stress, and Endurance testing.
JMeter comes with most of the features which help for regular testing but in some cases, we need to go out of the box and extend our scripting skills to support client requirements.
JMeter has a feature called Plugin Manager which will help us to install new features into our existing JMeter instance which will support different samplers to satisfy our requirements.
In recent days most applications will have at least one upload scenario like uploading an image (or) CSV file (or)pdf etc.
As performance testing we would need to include the uploading file scenario into our performance suite, By doing performance testing on such scenarios will help to check the performance of servers in terms of DiskIO, read writes and CPU utilization, and Memory.
How to Upload a File Scenario in JMeter?
In JMeter popularly used functionality is the HTTP sampler, HTTP Sampler in JMeter will support all HTTP methods like GET, POST, PUT, DELETE, etc.
With all content types including multipart, application/ JSON, etc, We can test Soap and rest calls also using JMeter HTTP sampler.
File Upload Scenario in JMeter (Video Guide)
Step-by-Step Procedure
To create an HTTP sampler to support the file upload scenario we need to follow the below steps
- Open JMeter instance
- After the instance is opened Add a thread group to test the plan
- Next, add HTTP Sampler to the Thread Group
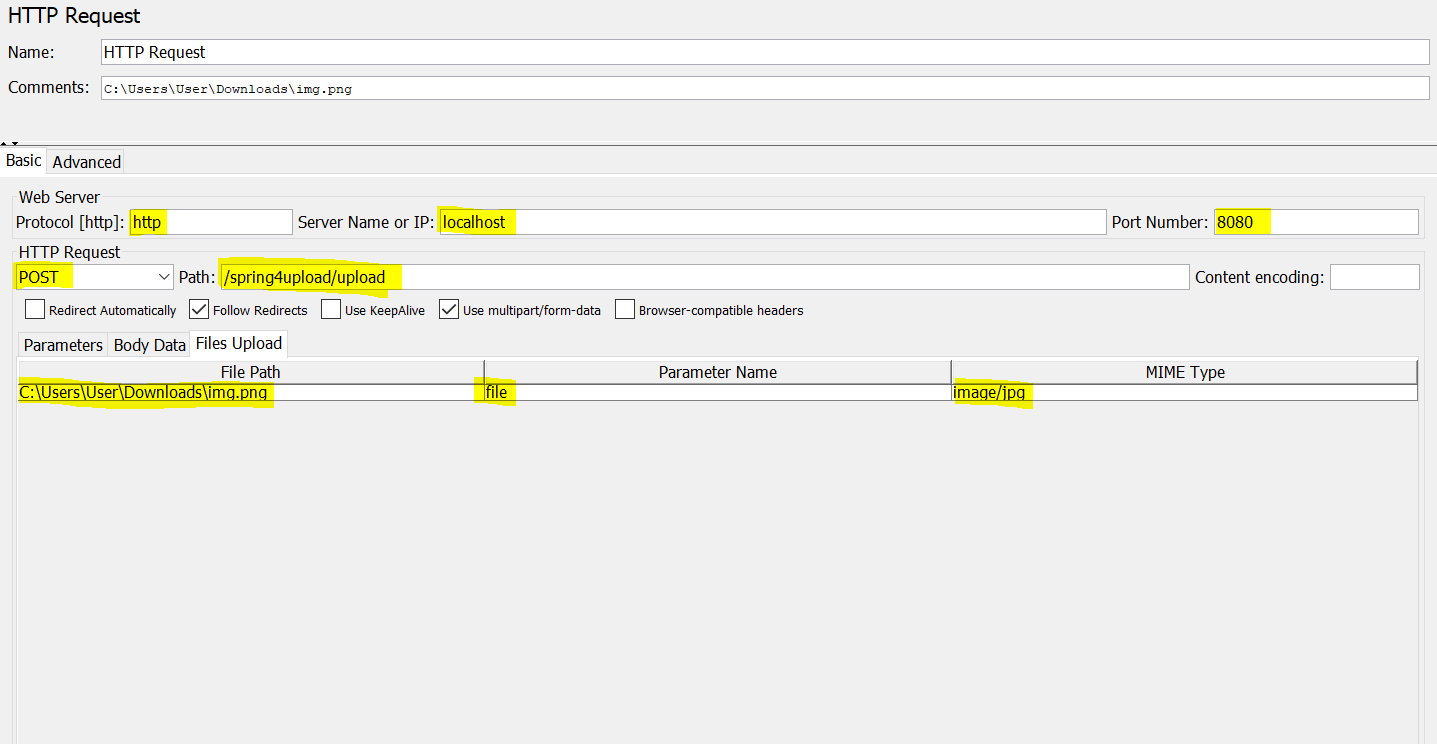
After adding the HTTP sampler we should see the below screen
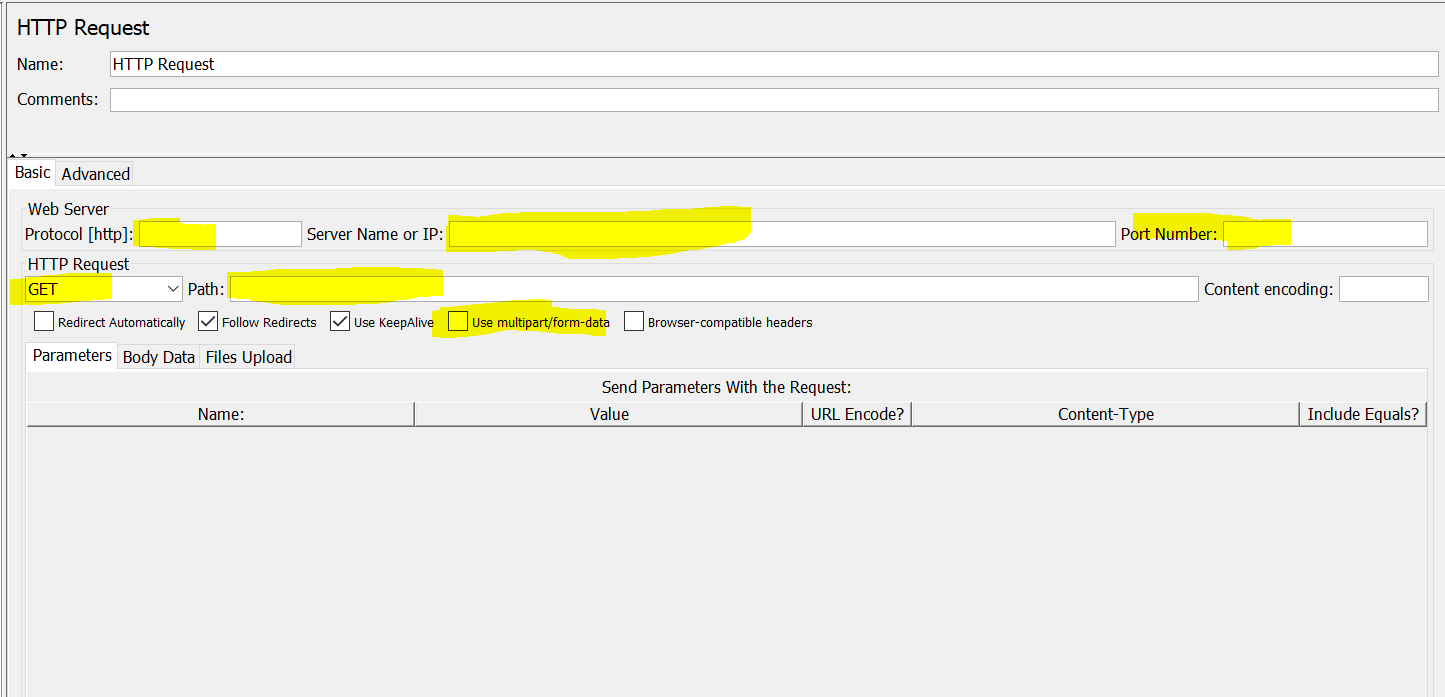
We need to fill above-highlighted details
- Protocol: HTTP or HTTPS
- Path: application URL
- Servername: IP address or hostname
- Port: port number on which server is running
- Enabling “Use multipart/form-data“.
After providing the above details click on the “File Upload” tab as shown below
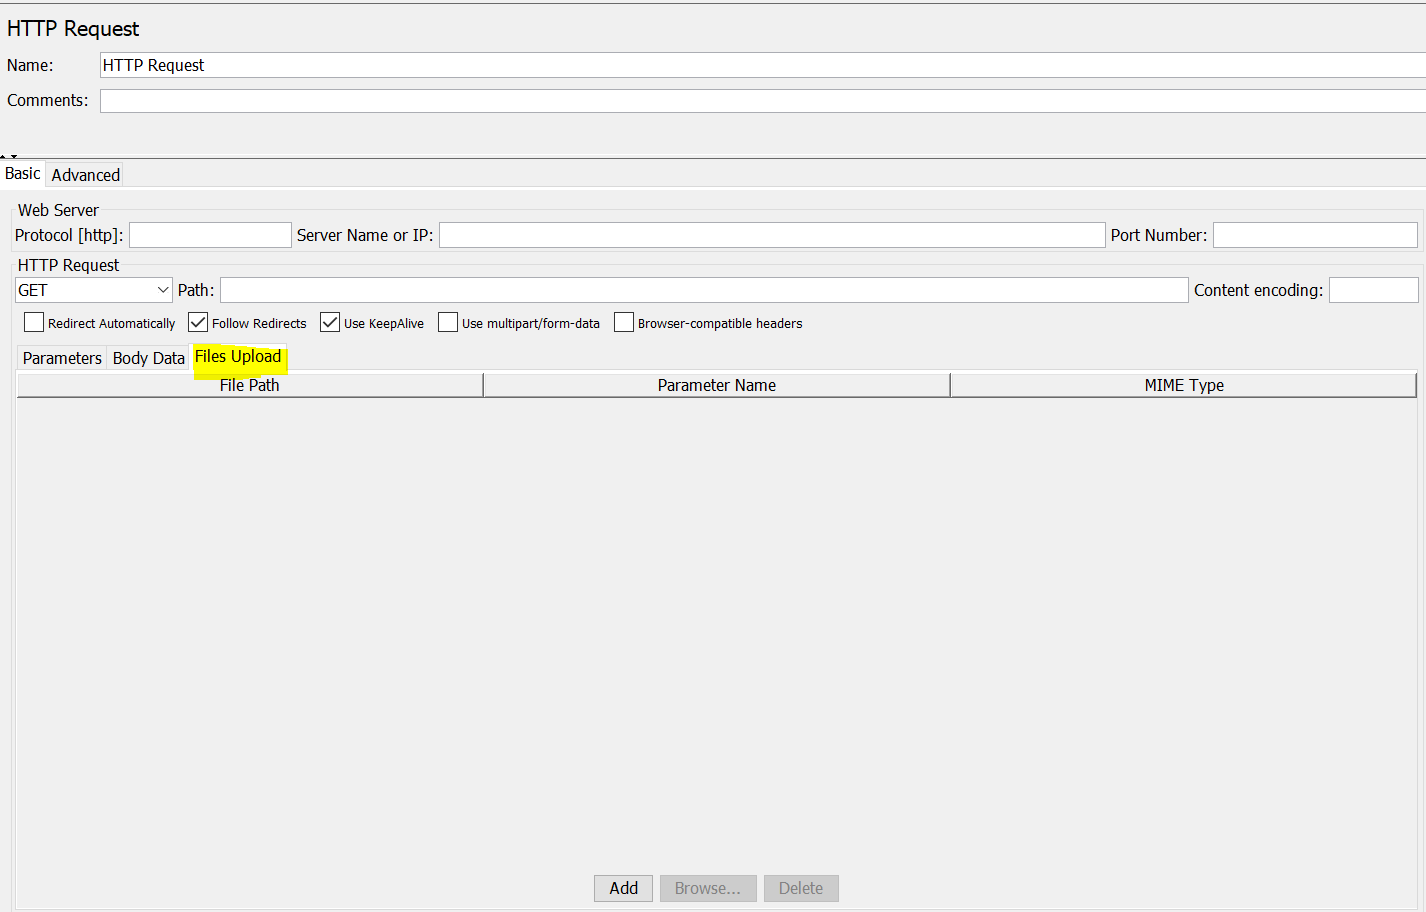
- After switching to the File upload Tab we need to click add button shown below
- After clicking on Add button text box will be added like below
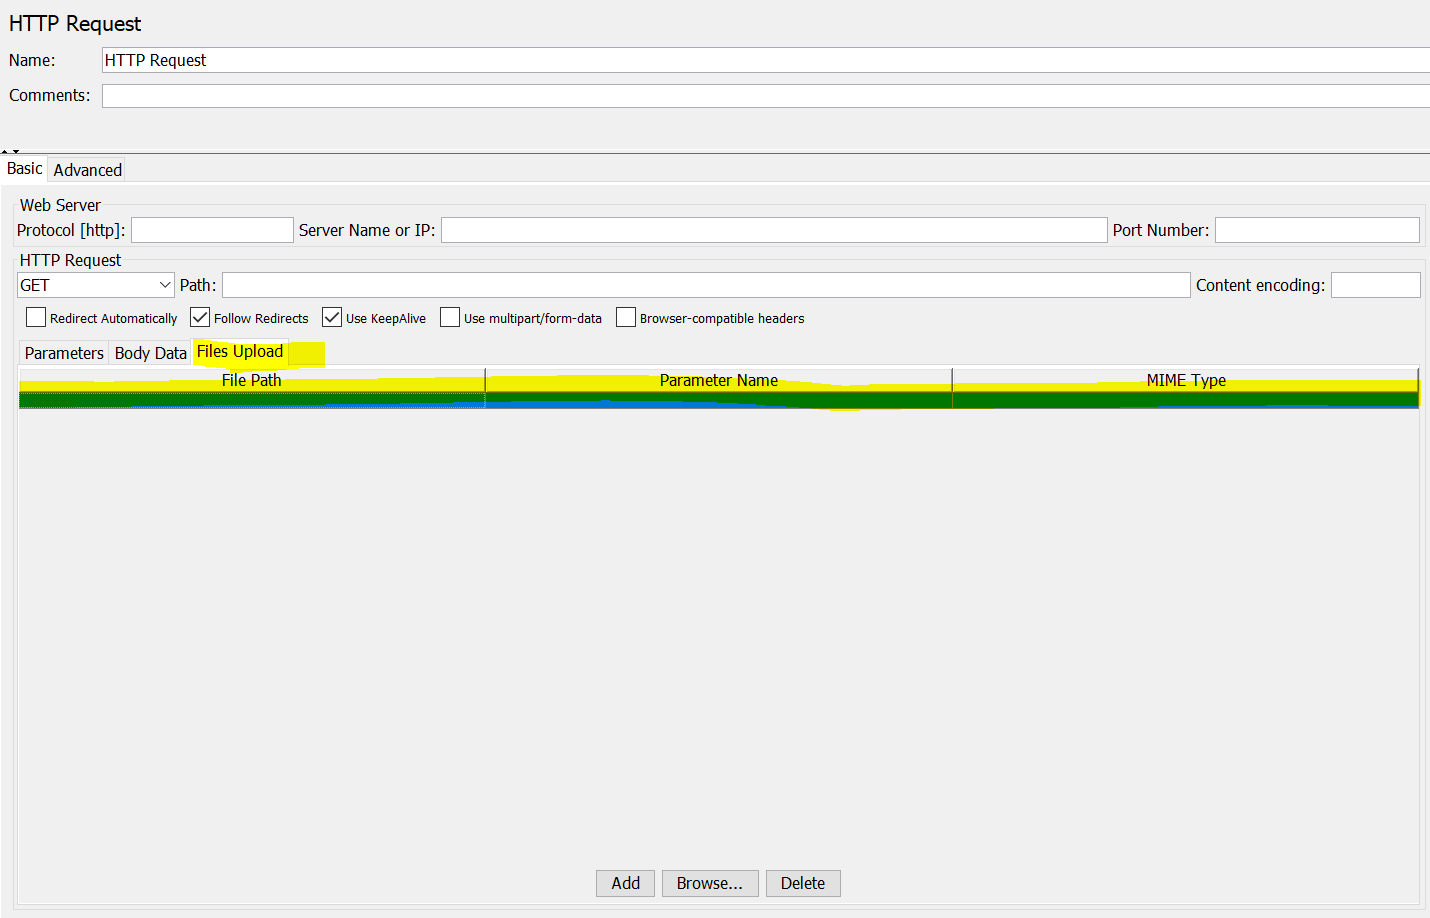
- Under “File Path” we need to give a full file path including the extension
- Under Parameter name: This is a post/put parameter that we can get from the recording script or network tab of developer tools.
- MIME Type: we have different types of MIME types like image/JPG, application/pdf, image/PNG, etc
- Each file will have a different MIME type based on the File type
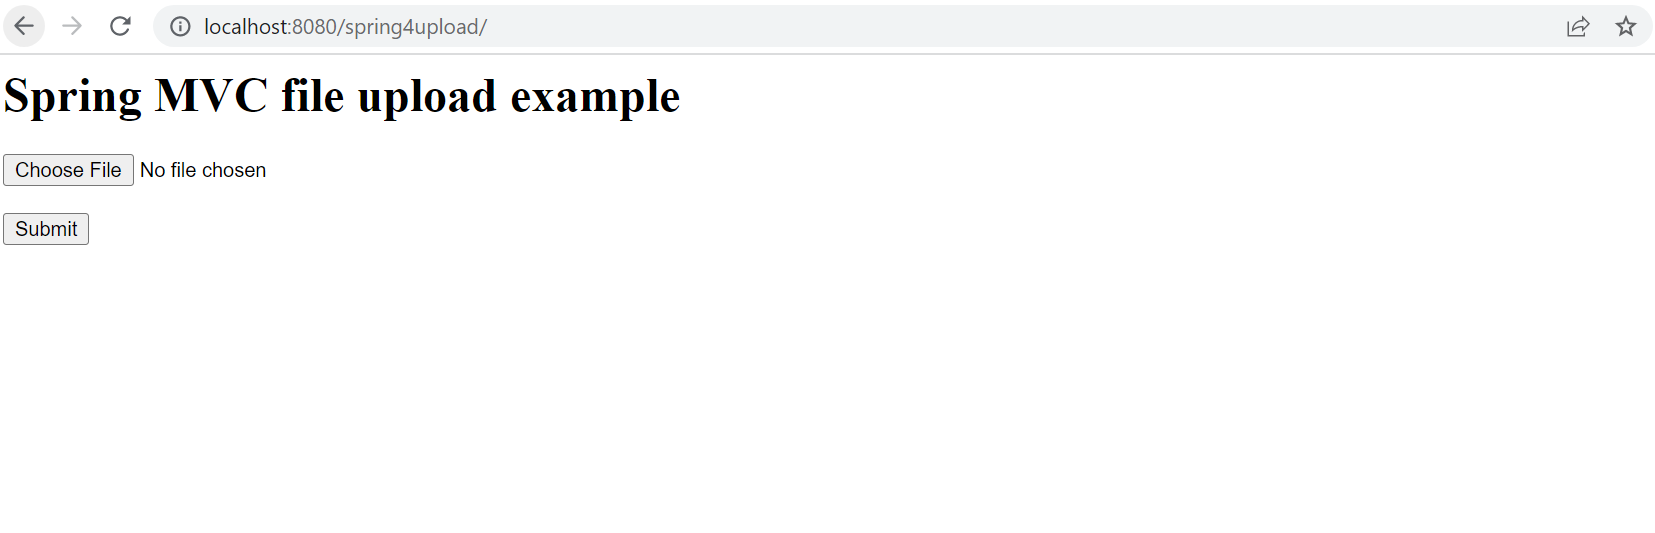
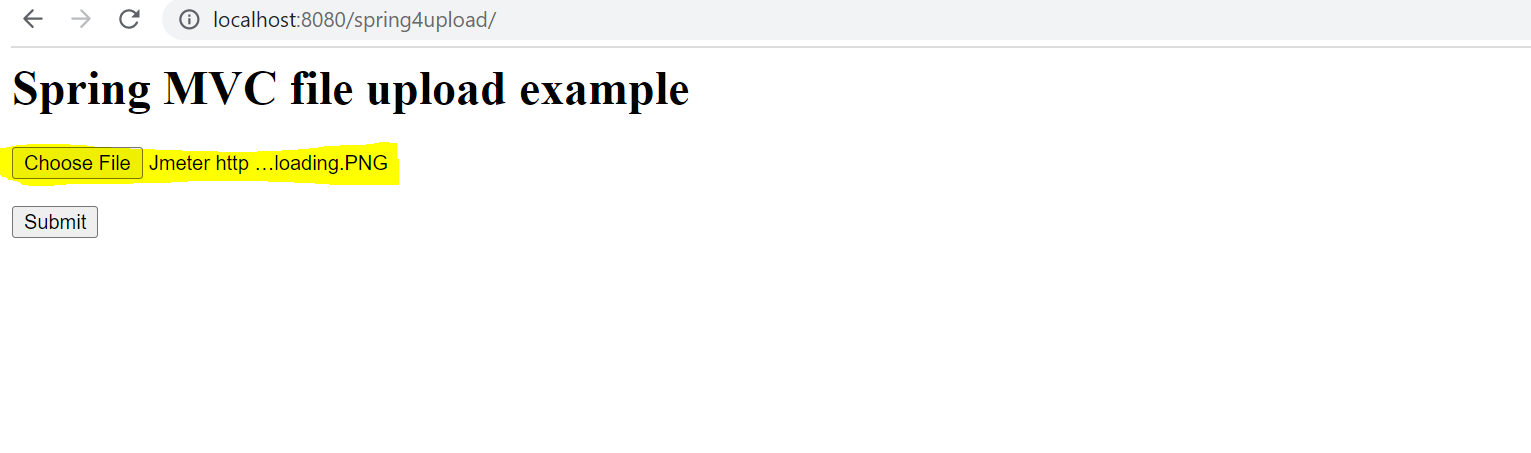
For testing, we have created a simple application for uploading the file local using tomcat for uploading we have used the URL: http://localhost:8080/spring4upload/
After entering the URL we will see the below screen
- After clicking button choose button and clicking submit it will upload
- Submitting the form will return this message
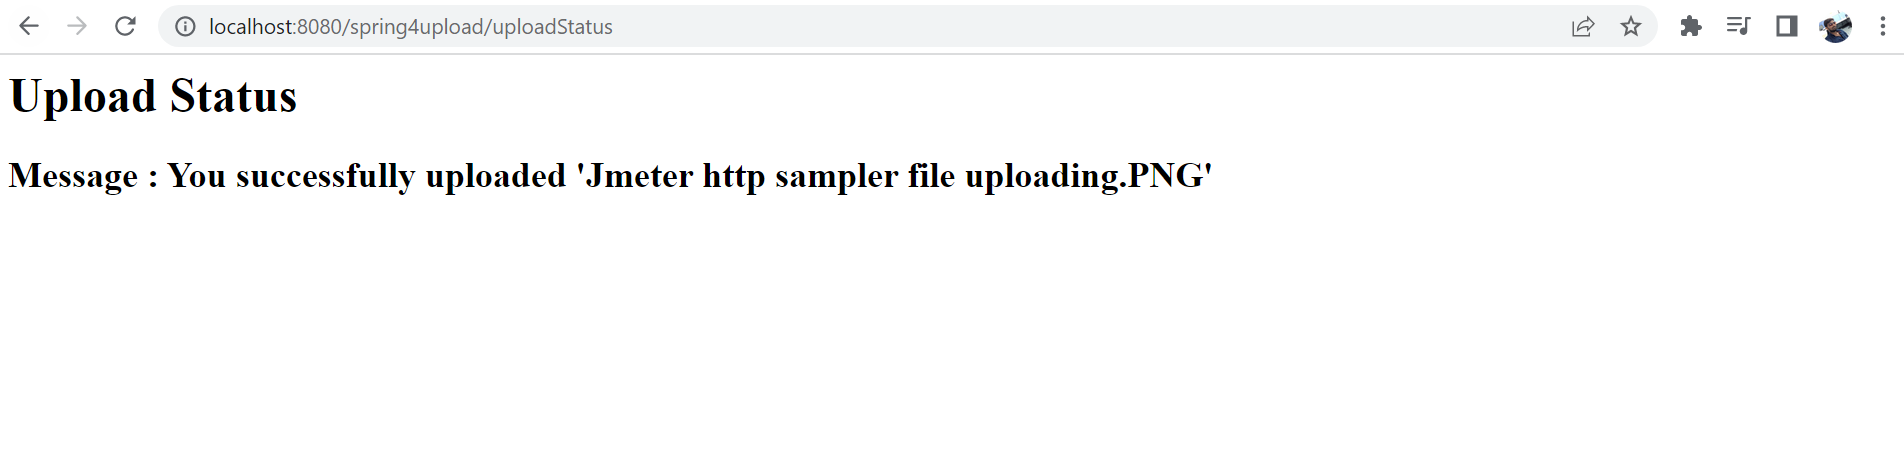
- After submitting the form this will be a success message
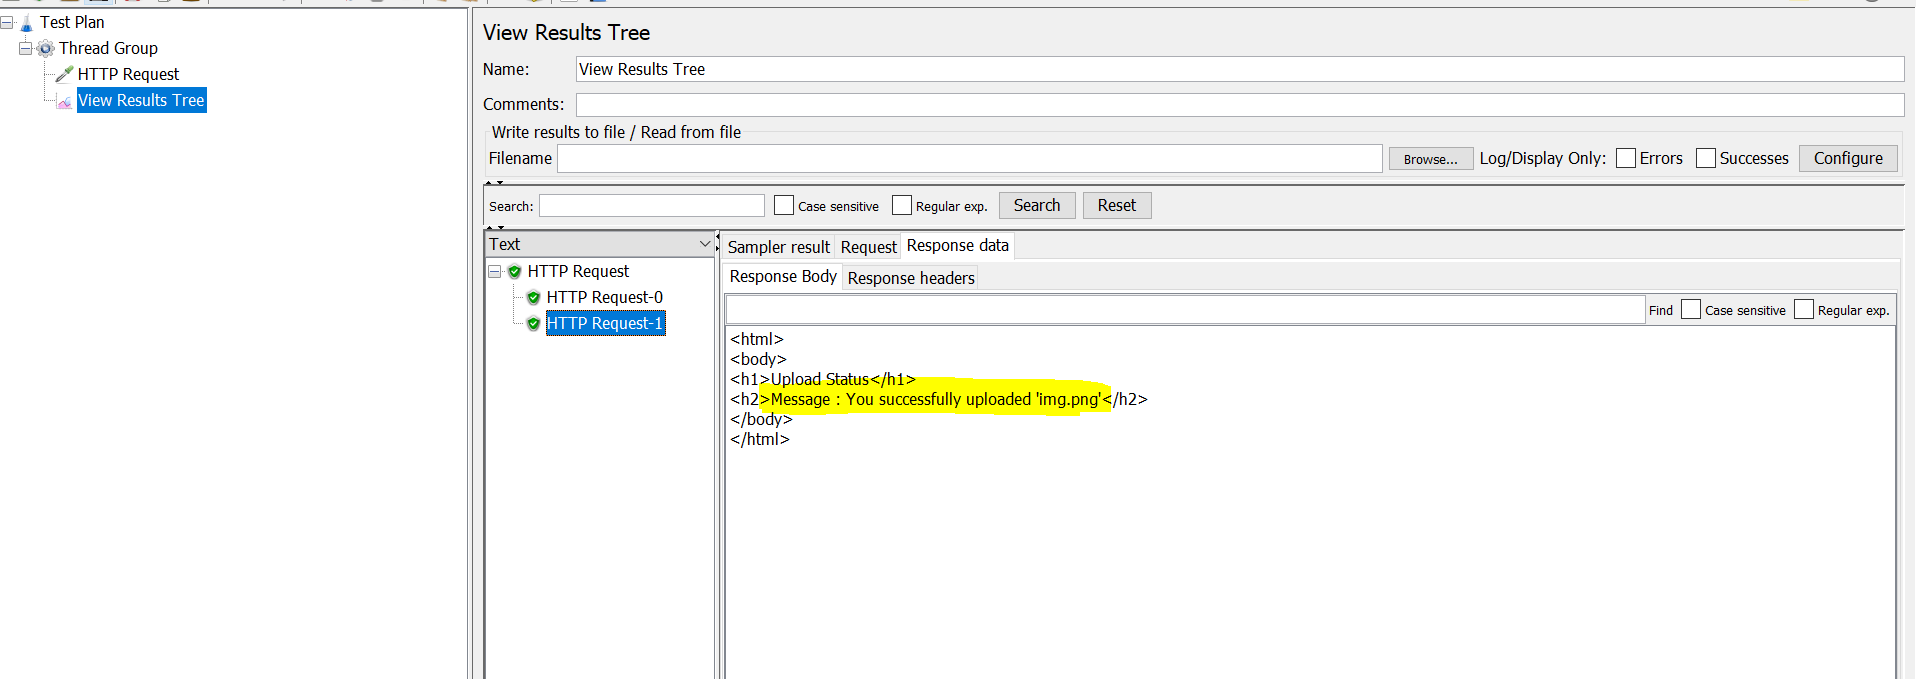
After following all the steps above in JMeter, your script will look like below
 After running the above script will be seen below the output
Hope this will help you
Happy learning